How to activate Finago Procountor integration
Last updated 5 months ago
⚠️Please note, that if you do not have access to payroll module and payroll in Procountor, when connecting Procountor to BI Book, then the general ledger will not add up, the Profit and Loss statement and Balance Sheet will be wrong. The user that activates the integration should have the access to payroll in Finago Procountor.
Open API in Procountor (API is closed by default. API has monthly fee, read here more about it).
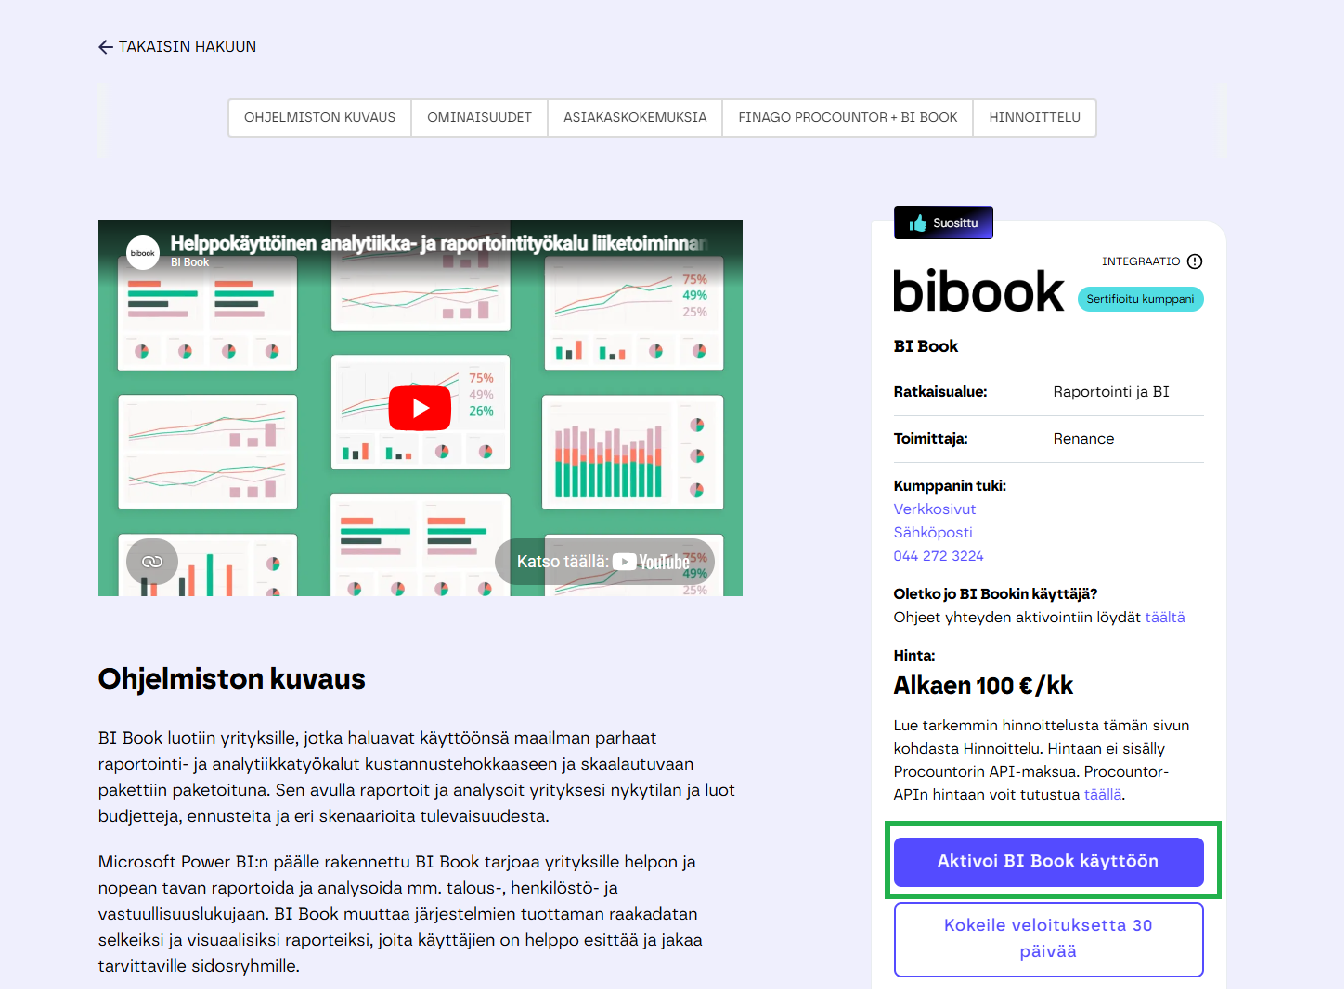
Go to Procountor Store and search BI Book or go directly to the store page using the followin link: BI Book - Finago Procountor Store integraatio
On BI Book store page click “aktivoi BI Book käyttöön” / “activate BI Book”
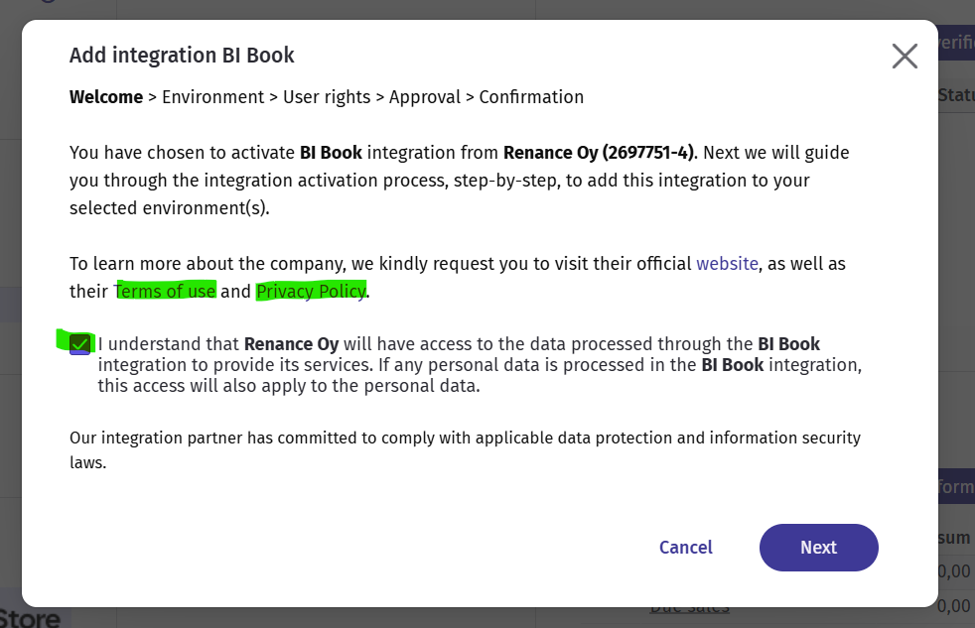
You will be redirected to your company’s own Procountor page, log in if you aren’t logged in yet. A popup as shown in the image will appear on the Procountor page, where you can review and accept the BI Book terms of use and privacy policy. Click Next.
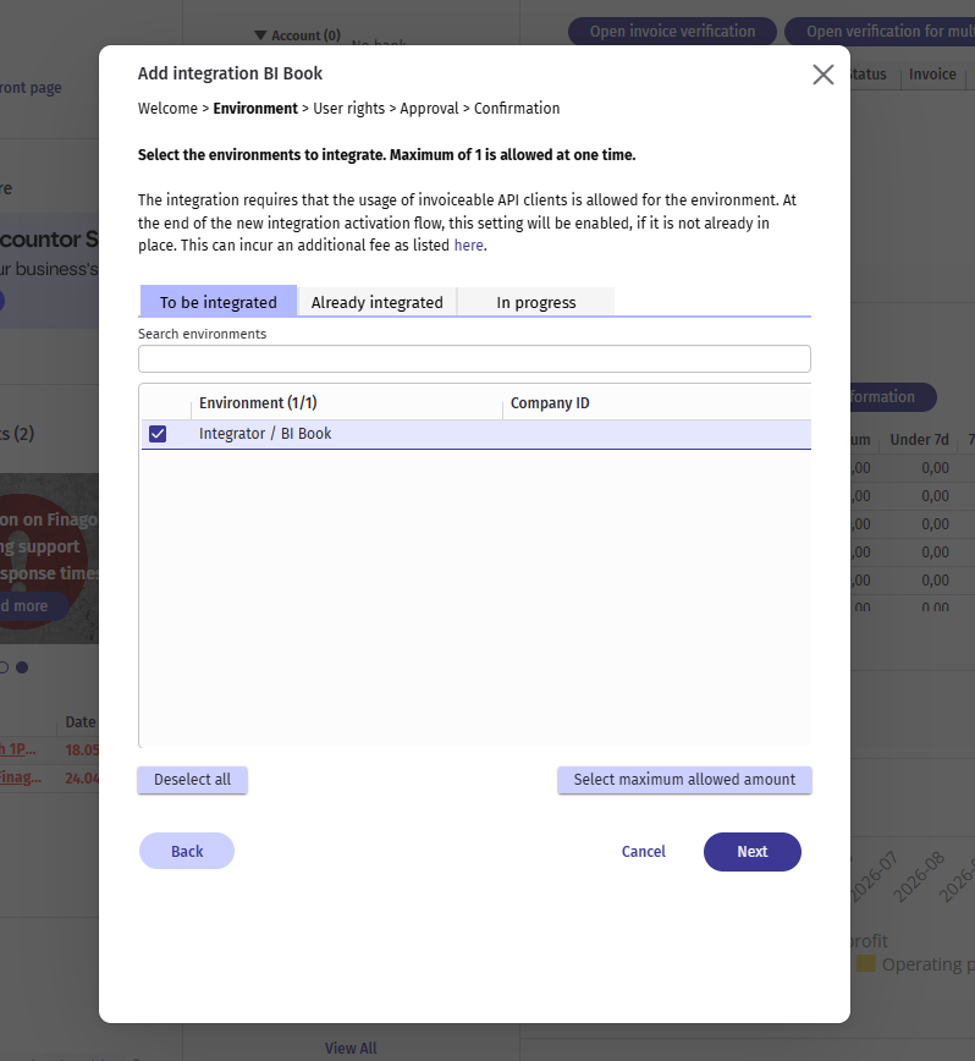
Next, you can choose which company environment you want to activate. If you work in a group company, multiple companies may appear hear. Unfortunately, you can only activate one company integration at time. Click Next.
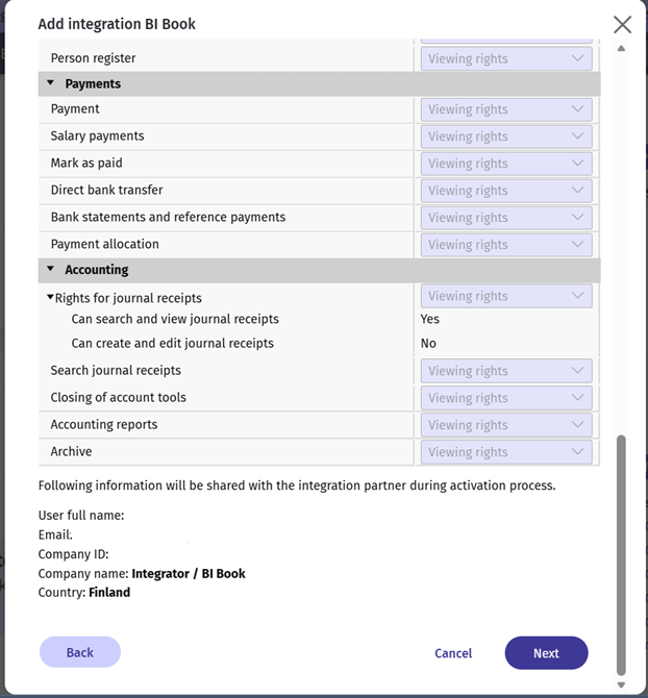
Next, you will see what information the BI Book integration will read from Procountor. Click Next.
Next, you need to confirm that you want to complete the activation in BI Book.
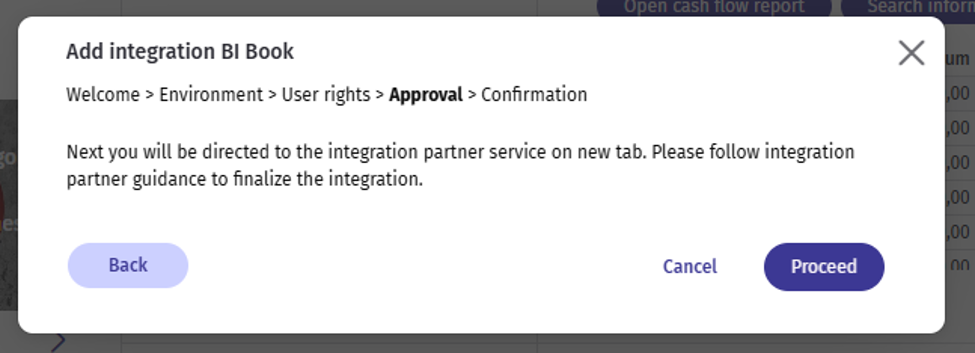
After the redirect and during the activation process, BI Book may ask you to log in and authenticate your account one or two times. Please sign in using your company’s email service provider (Google or Microsoft authentication).
Please note that the activation process cannot be completed unless the authentication steps are successfully completed.
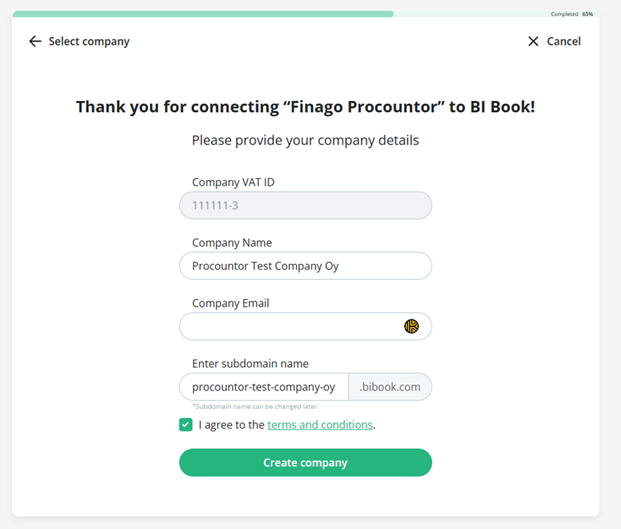
Next, you will be redirected in a new pop-up window to the final step in BI Book, where you must complete the activation process. The Company VAT ID will be transferred automatically from Procountor, but you must enter the following information:
Company Name – Enter the company’s official registered name.
Company Email – Enter your email address (the person completing the activation).
Enter subdomain name – When you click the field, the system will automatically suggest a domain name based on the company name. You may modify this if desired.
Terms and Conditions – Accept the terms and conditions once again. If you have not yet reviewed them, please read them carefully before proceeding.
After completing the required fields, click “Create Company”.
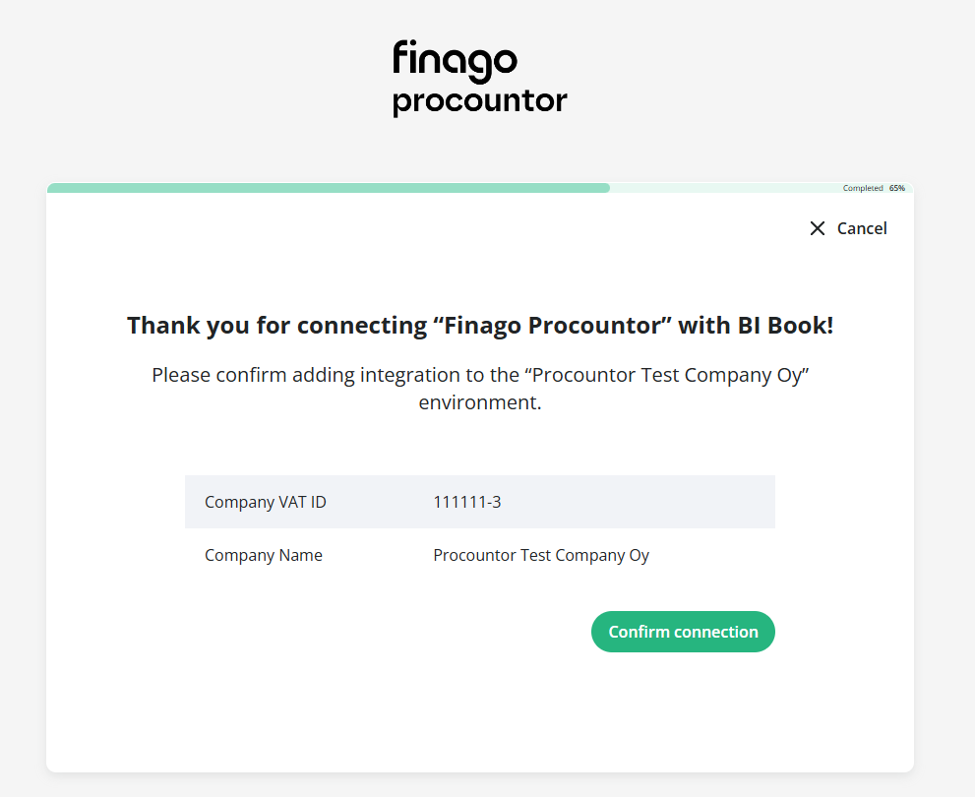
After submitting your company information, you will be transferred to the next page where you confirm the integration. Press the button "Confirm connection"
After confirming the connection, you will be transferred to the next page where it says ""Procountor was succesfully connected to "your company name" environment".
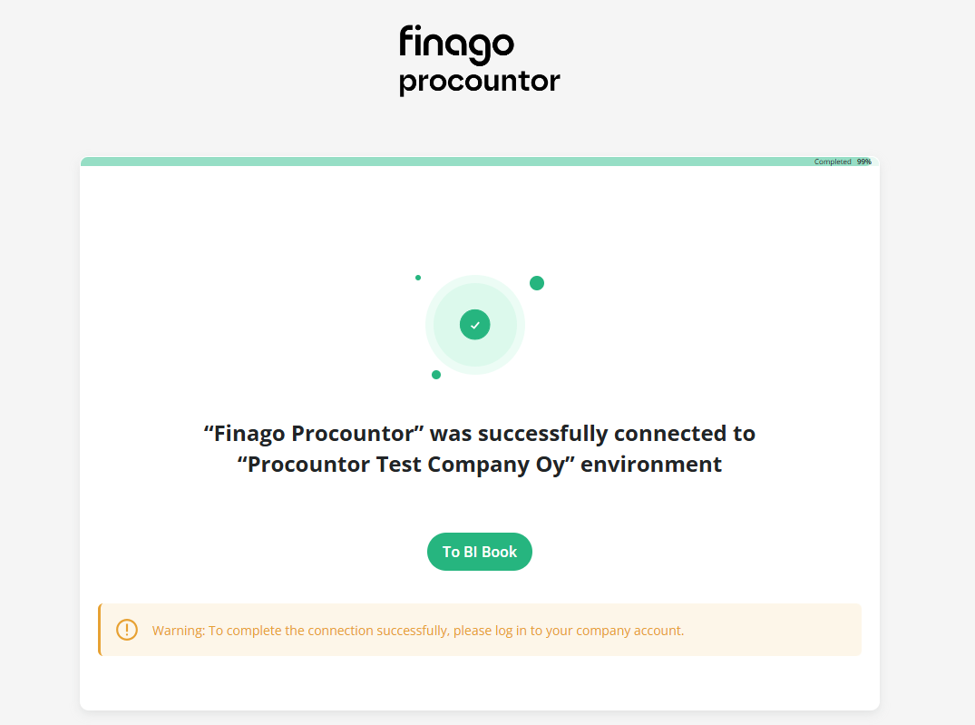
At this stage, click the green “To BI Book” button. The service will then ask you to log in and complete the authentication process once more in order to finalize the integration.
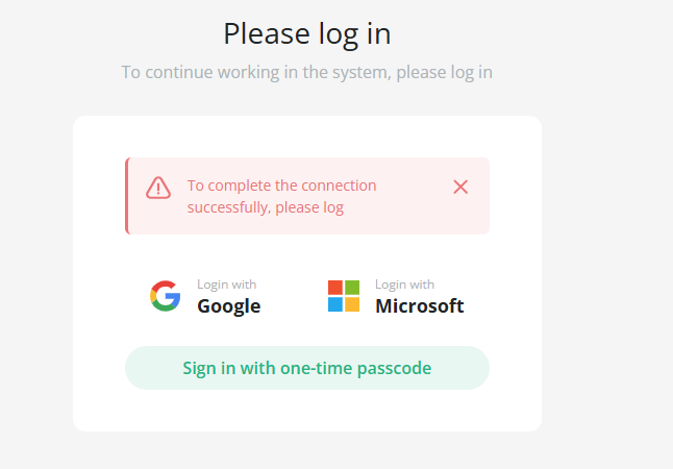
Once you have completed the login process, the BI Book – Procountor integration will be successfully activated and a BI Book environment will be created for your company.
Financial reports based on your Procountor data will be generated automatically within approximately 10–20 minutes. These reports can be found on the Analytics and Content pages within BI Book.
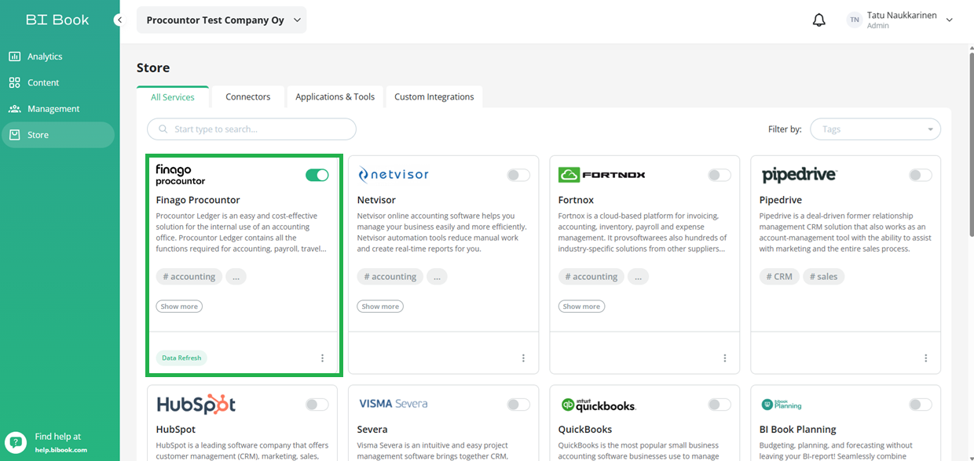
You should also receive a confirmation in Procountor indicating that the integration has been successfully activated. In addition, the Procountor integration should appear as active in the BI Book Store, as shown in the example image below.
IMPORTANT!
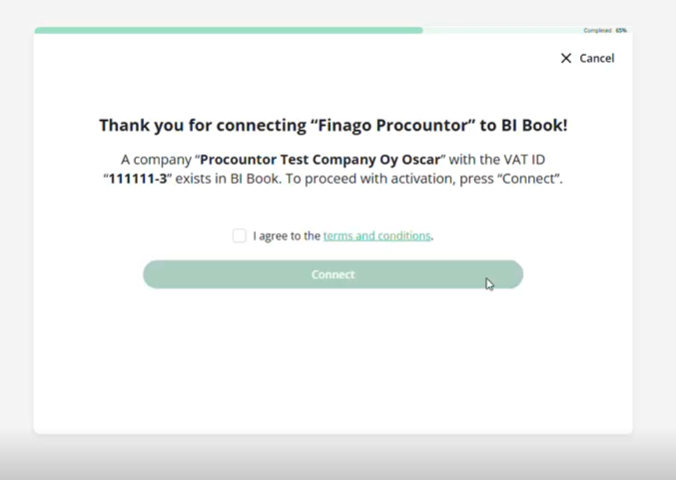
If you are already BI Book’s current customer and BI Book environment is already live, the activation process is almost the same. When you will be directed the BI Book side and BI Book recognize that your company has already environment you can integrate it to that environment. You just have to be Admin user in that environment!
Was this helpful?
Still need help? Ask the team