Import Users from Excel
Add, update and remove many users at once by uploading an Excel file. You can also use the same file to give users access to reports, forms and folders.
Last updated 5 days ago
Who can do this: company Admins.
💡Important: the file replaces your current user list. Anyone who is in BI Book today but not in your file will be removed from the company and will lose all access. Always start from a fresh export so you do not remove people by accident.
Please note that this feature is primarily intended for adding multiple users at once and assigning them to user groups.
Managing direct access to individual content objects through this tool is limited and not as straightforward, and may require additional manual configuration within BI Book.
Before you start
Make sure any user groups you want to use already exist (Management > Groups). The import does not create new groups.
Your own email address must stay in the file. The import is blocked if it is missing.
You cannot run an import while a user export is in progress.
Step 1: Download your current users
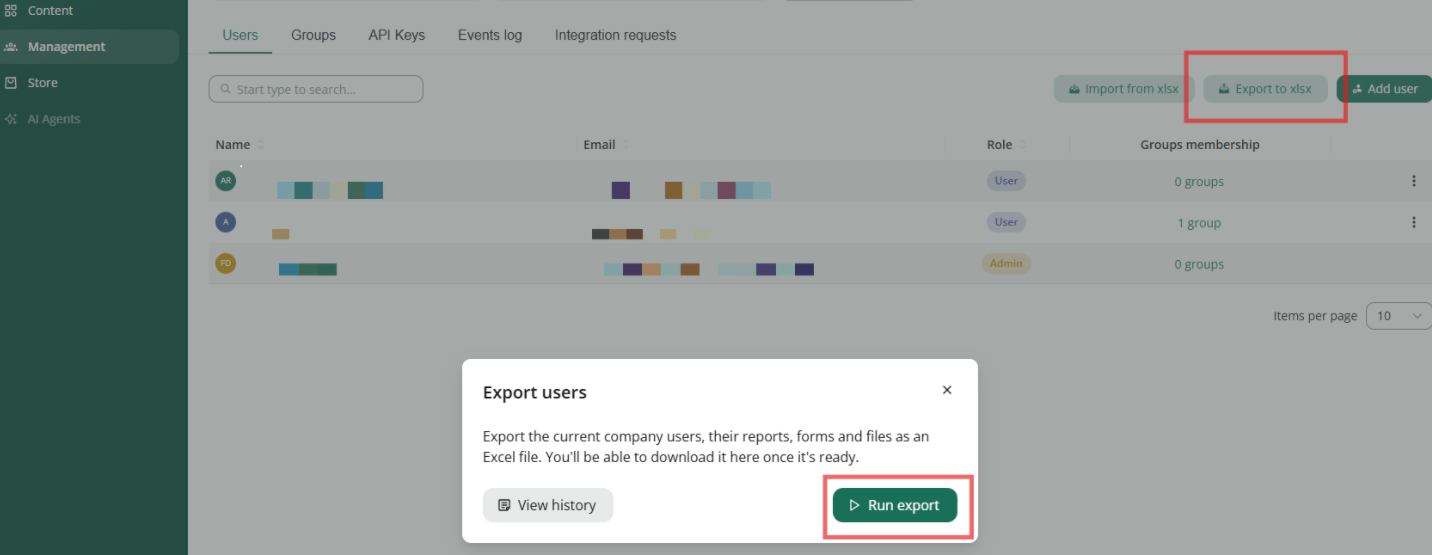
In the left menu, click Management.
Open the Users tab.
Click Export to xlsx, then Run export.
When the export is finished, click Download. You will also receive a download link to your email. The file will be available for download for up to 24 hours, after which the download link will expire both in your email and in BI Book.
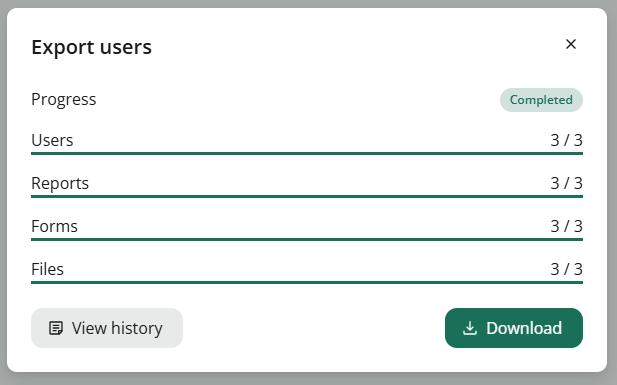
Depending on the number of users and content objects in your environment, exporting users may take some time. You can close this window and continue working in BI Book while the export is in progress.
However, please avoid changing permissions or access rights until the export file is ready.
Keep a copy of this file somewhere safe. It is your backup. If something goes wrong, you can import it again to get back to how things were.
See Export users to Excel for more detail.
Step 2: Edit the file
Open the file in Excel. It has four sheets. Do not rename, delete or reorder the sheets or the column headings.
Users sheet
One row per user.
To add a user: add a new row with their email, name and role.
To change a role: change the value in the Role column.
To change groups: edit the User Group column. If you leave this cell empty, the user's groups stay as they are.
To remove a user: delete their whole row.
Reports, Forms and Files sheets
These sheets control which reports, forms and folders each user can open. Each row gives one user access to one item.
To give access: copy an existing row for the same report, form or folder, then change the Email, Name and Role to the user you want to add.
To remove access: delete the row.
The Role in these sheets must match the user's role on the Users sheet. If it does not, the row is skipped.
On the Files sheet, access is given to the whole folder. The file columns are there for your information only.
☝️Access that a user gets through a user group is not affected by these sheets.
Tip: The easiest way to get the right UUID is to copy it from an exported file. Do not type UUIDs by hand.
Save the file as .xlsx.
Step 3: Upload the file
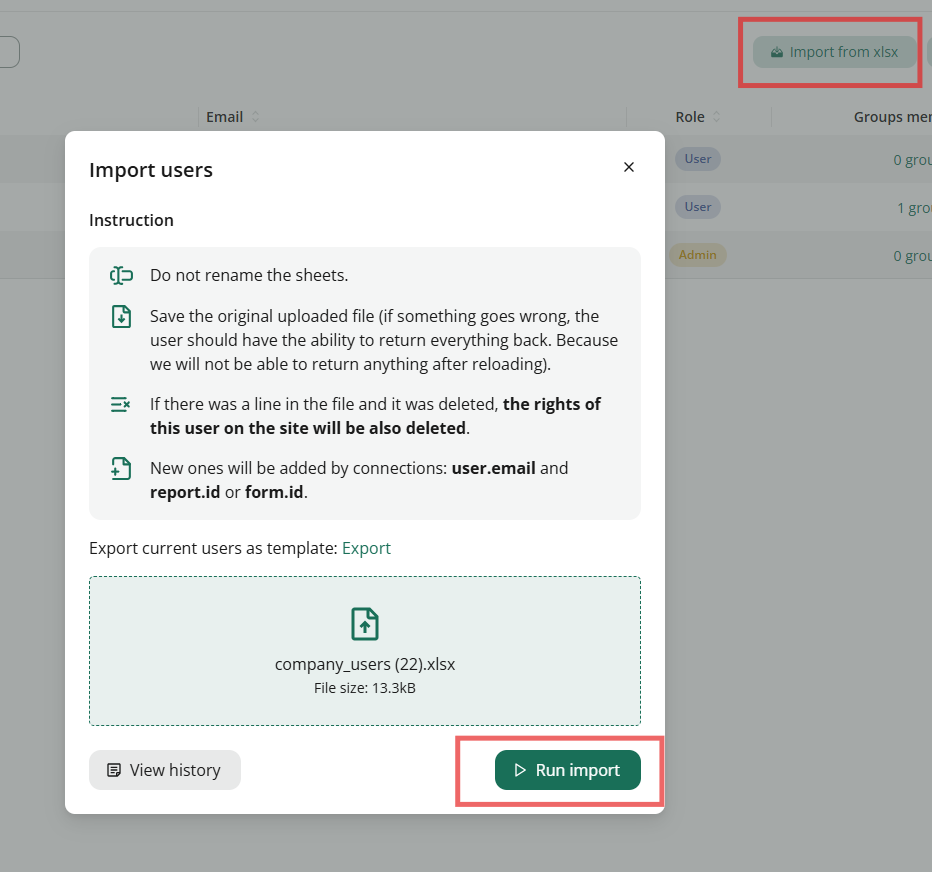
Go to Management > Users.
Click Import from xlsx.
Drag your file into the upload area, or click it to choose the file. The file must be .xlsx and smaller than 3.9 MB.
Click Run import.
You will see a progress bar for each sheet. You can close the window while it runs. To check on it later, click Import from xlsx again.
Step 4: Check the result
When the import is finished, you will see a summary, for example:
Created: 3, updated: 5, removed: 1
Created: new users added to the company. If invitation emails are turned on for your company, they will receive one.
Updated: existing users whose role or groups changed.
Removed: users who were not in your file and have been removed from the company.
Check the user list to confirm everything looks right.
If the import fails
Nothing is changed if the import fails. Either the whole file is applied, or none of it is.
The error message tells you the sheet and row number with the problem, for example:
sheet: Users, row: 7, errors: Email is invalid
Fix that row in your file and upload it again.
Stop an import
If you need to cancel the import, while its running:
click Cancel, then Stop import. Nothing from the file is applied. To try again, click Run import.
See past imports
In the import window, click View history to see earlier imports, when they ran, their status and their result. Hover over a failed status to see the error.
Every user added, changed or removed by an import is also recorded in Management > Events log.
Was this helpful?
Still need help? Ask the team